B's Favorite, Cake, Desserts Brenda Drake + Chelsea Kasen B's Favorite, Cake, Desserts Brenda Drake + Chelsea Kasen

Lava Cake

Brenda’s favorite cake, and the first birthday cake she baked for the first of John’s Birthday’s they spent together as a married couple.

The first of John’s birthday’s we spent together was four months after our wedding. I wanted to make a birthday cake for him . . . only I was uncertain which was his favorite. I poured over my cookbooks, seeking inspiration as I tried to guess the one he would choose - but desiring to surprise - I couldn’t simply ask.

After much internal deliberation, I selected the best choice, and I gathered and assembled and baked . . . I made my favorite cake for my favorite man.


Lava Cake

Set oven temperature to 425F.

Butter & flour complete interior surface of four - 4 oz ramekins. Place prepared ramekins on a sheet pan, set aside.

To the bottom pot of a double boiler*, add:

~2 cups water

Set over high heat on stove, and bring to a boil.

While heating water, to the top bowl of a double boiler* add:

4 oz unsweetened chocolate, coarsely chopped

1/2 cup butter

Set bowl over heated water, reducing stove temp to medium-low. Stir periodically and while melting, prepare the following . . .

To the bowl of a stand mixer, add:

2 egg yolks

2 eggs

1/4 cup sugar

Mix on medium speed until the mixture thickens and lightens in color. Reduce mixer speed to “stir” and slowly pour in the melted chocolate mixture. “Stir” until completely combined.

Divide batter equally among the four prepared ramekins. Transfer sheet pan with filled ramekins to preheated oven. Bake for ~8 minutes. Remove from oven.

Remove lava cake from ramekin:

  1. Slide a paring knife around the lava cake, loosening it from the ramekin

  2. Place a dessert plate over the top of the ramekin

  3. Hold the plate tight to the ramekin and, utilizing a hot pad, invert the ramekin & plate

  4. Slip a fork under the edge of the ramekin and pull the ramekin off

Serve hot, with fresh whipped cream and salted caramel sauce.


Brenda’s tips:

  • Serving size: 4

  • If milk chocolate is preferred over dark chocolate, substitute any combination of sweetened chocolate for the unsweetened chocolate

  • For gluten-free, substitute cocoa powder or granulated sugar for the flour to butter & “flour” the ramekins (demonstrated in the Window to B’s Kitchen below)

  • Lava cakes can also be prepared using an electric mixer or whisk

  • Lava cakes can be prepared in advance . . .

    • Refrigerate the raw cakes (in the ramekins)

    • Remove from refrigerator and bring to room temp, resting ~30 minutes

    • Bake as directed above

  • *Double boiler: used when making a recipe that requires indirect heat, it’s two pots (or a pot and a stainless steel bowl), where the top nestles slightly within the bottom, leaving a few inches of space under the bowl

    • the bottom is filled ~ halfway with water and heated over the stove to create hot steam

    • the top bowl contains the chocolate, and the indirect heat created by the steam will melt it without burning or drying out the chocolate


Window to B’s kitchen . . .

Melting the chocolate . . .

Making the batter . . .

Preparing the ramekins . . .

Removing the baked cakes from the ramekins . . .

Read More
B's Favorite, Basic Skills, How To Brenda Drake + Chelsea Kasen B's Favorite, Basic Skills, How To Brenda Drake + Chelsea Kasen

HOW TO: Select a Ripe Avocado

Please stop squeezing avocados, simply brush or flick the stem instead. We’ll show you how!

Please stop squeezing avocados, simply brush or flick the stem instead. Squeezing avocados will result in dark bruises that can make it inedible.


HOW TO: Select a Ripe Avocado

Gently brush or flick the stem of the avocado . . .

  1. Stem doesn’t budge: the avocado is still too green to consume

    • It should be ready to eat in 2 to 5 days: store at room temperature and check stem daily

    • Be careful not to force the stem off, applying excessive pressure will remove the stem but it won’t make the avocado any more ripe

  2. Stem removes easily & fruit is green under the stem: the avocado is perfectly ripe and ready to enjoy

    • Eat it today or tomorrow

    • It is recommended to store a perfectly ripe avocado in the refrigerator after it has ripened

  3. Stem easily flicks off & fruit inside is darkly colored: the avocado is past it’s prime

    • Avoid the avocado, most likely it has rotted

Note: exterior color doesn’t always indicate ripeness. A ripe avocado may appear bright green or almost a purplish black. It’s best to simply brush or flick the stem to identify the perfect avocado.


Brenda’s tips:


Window to B’s kitchen…

Read More
B's Favorite, Chicken, Slow Cooker, Savory Brenda Drake + Chelsea Kasen B's Favorite, Chicken, Slow Cooker, Savory Brenda Drake + Chelsea Kasen

Crockpot Shredded Chicken

This is the best way to make it and, bonus, it’s also the easiest.

Need shredded chicken? This is the best way to make it and, bonus, it’s also the easiest.

This recipe is one of Brenda’s Fundamental Favorites. It’s intended to be leveraged to fit any cooking scenario where you need shredded chicken.


Crockpot Shredded Chicken

To the removable bowl of the slow cooker, add:

1/8 cup water

1 lb chicken, boneless skinless breasts

Lightly season with:

Garlic Salt

Select heat setting on the slow cooker:

  • High: cook for 3-4 hours

  • Low: cook for 6-8 hours

Cook until chicken shreds easily with a fork.

Remove from crockpot, and shred:

  • placing chicken on a plate and shredding between two forks.

  • add to bowl of stand mixer, fitted with the paddle attachment & turn speed to 2-3 and chicken will shred in ~30 seconds.


Brenda’s tips:

  • Serving size: 1 lb chicken makes 4 servings

  • Frozen? Add ~1 hour to the cooking time for the same tender results

  • Prepare in larger batches, shred, portion, and freeze for later

  • Adjust seasonings as desired, some suggestions:

    • rosemary, crushed

    • paprika, chili powder, cumin & coriander

    • basil & parsley

  • Delicious in:


Window to B’s kitchen…

Read More
B's Favorite, Desserts, Pie, Garden Produce Brenda Drake + Chelsea Kasen B's Favorite, Desserts, Pie, Garden Produce Brenda Drake + Chelsea Kasen

Double Raspberry Pie

It’s difficult to pick a favorite pie, but this Double Raspberry Pie is definitely in the running.

Anyone who knows Brenda knows she has a serious love of pie. While writing this recipe, she said the following:

It’s a difficult decision to pick ones very first favorite pie - but this Double Raspberry Pie is definitely in the running.


Double Raspberry Pie

Step 1: Prepare Crust

Make dough for one 9” bottom pie shell (uncooked), select recipe 1, 2 OR 3 for the pie crust based on your preference (Brenda uses the Pie Crust for High Elevation). Roll out dough and place in a deep-dish pie plate (regular depth is an acceptable substitute).

Do not bake or poke with a fork. Cover & set aside.

Step 2: Prepare Streusel Topping

To a small bowl, add:

1/2 cup flour

1/2 cup brown sugar

1/4 cup (1/2 square) butter

Using a fork, cut together until a fine sandy mixture results. Set aside.

Step 3: Prepare Junkit + Raspberries + Bake

In a medium pot, combine:

3/4 cup water or juice, cold

1/3 cup sugar

3 Tbsp corn starch

Whisk together. Turn heat to medium-high (7/10). 

Bring to a boil, stirring continuously.

  • Note: A rolling boil will fully activate the corn starch and thicken the syrup.

Boil for 1 minute, then remove from heat. Add:

1 Tbsp butter

1-5 drops red food color

Stir until smooth.

Fold in:

2 cups frozen raspberries (keep frozen until use)

Pour junkit + raspberries into prepared (unbaked) pie shell. Cover with streusel topping. Bake at 350F for ~60 minutes, until golden brown. Let cool completely (ideally overnight, if time allows).

~60 minutes prior to serving . . . Step 4: Top with Raspberry Whip

To the bowl of a stand mixer, add:

4 oz cream cheese

1/4 cup sugar (granulated)

Cream together using the paddle attachment, then add:

1 1/2 cups heavy cream

1/4 tsp vanilla

“Stir” on low speed until combined, scrape sides, then increase speed to medium/high until thickened. Remove bowl from stand. Carefully fold in:

~1 cup raspberries, fresh or frozen

Spoon the Raspberry Whip over the completely cooled streusel of the baked raspberry pie.

If desired, garnish with:

Fresh raspberries

Refrigerate. Serve cold.


Brenda’s tips:

  • Serving size: one 9” pie, ~8 servings

  • This pie is fabulous with either fresh or frozen raspberries. When raspberries are in season definitely use fresh, but at other times the frozen berries is an equal quality substitute.


Window to B’s kitchen…

Double Raspberry Pie after Step 3: Prepare Junkit + Raspberries + Bake

Read More
Breakfast, Bread, B's Favorite Brenda Drake + Chelsea Kasen Breakfast, Bread, B's Favorite Brenda Drake + Chelsea Kasen

Best Blueberry Muffins (Small Batch)

Make 12 regular or 6 jumbo blueberry muffins with this recipe.

This recipe makes 12 standard muffins, or 6 jumbo muffins.

Looking to make 24 standard muffins, or 12 jumbo muffins?


Best Blueberry Muffins (Small Batch)

Set oven temperature to 425F.

In a small bowl, sift together dry ingredients:

2 1/2 cups (12 oz) flour

1/4 tsp salt

1 1/2 tsp baking powder

1/8 tsp baking soda

Set aside.

In a small bowl, stir together dairy:

1/2 cup buttermilk

1/4 cup sour cream

Set aside.

In the bowl of a stand mixer, combine:

1 1/8 cup sugar

1/4 cup oil

1/4 cup butter

Cream until lightened in color, about 2 minutes on medium speed.

Add, stirring after each addition:

2 eggs

1 tsp vanilla

1 tsp lemon extract

Stir until smooth, then fold in:

Dry ingredient mixture

Stir in:

Dairy mixture

Once smooth, fold in:

1 cup blueberries, semi-frozen


Line muffin tin with paper cups.

Evenly divide* batter.

Over each muffin, sprinkle:

1/8 tsp sugar

Bake:

  • 12 standard muffins:

    • Bake 15 minutes at 425F

    • Reduce heat to 350F and bake 5-10 min (clean toothpick)

  • 6 jumbo muffins:

    • Bake 15 minutes at 425F

    • Reduce heat to 350F and bake 15-20 min (clean toothpick)


Brenda’s Tips:

  • It is CRITICAL that you don't over-bake these muffins. They dry out quickly so be watchful and make sure to remove from oven as soon as they have set.

  • Makes one dozen standard muffins. Brenda prefers using paper cupcake liners that are 2 1/4" x 1 7/8" (they're harder to find so naturally she often uses the more accessible 2" x 1 1/4" liners). Note: first number is diameter of base of cup, second is the height of the cup's side.

  • Substitute any frozen berry for delicious results. Recommended to try raspberries or huckleberries. 

  • *To portion, Brenda uses a 3T cookie scoop.

    • 12 standard = 1 scoop each, slightly rounded

    • 6 jumbo = 2 scoops each, slightly rounded

Read More
Bread, Main Dish, Savory, Pork, B's Favorite, Bacon Brenda Drake + Chelsea Kasen Bread, Main Dish, Savory, Pork, B's Favorite, Bacon Brenda Drake + Chelsea Kasen

BLTs

Fresh ground pepper and mayonnaise are the star ingredients in Brenda’s version of this classic sandwich.

BLTs. Bacon Lettuce Tomato sandwich. Brenda’s favorite sandwich.

The ingredients key to the most sublime BLT generally go unrecognized . . . fresh ground pepper and mayonnaise. Brenda highlights both of these ingredients in her version of this classic sandwich.


BLTs

Make a loaf of french bread

Cook the bacon

Chop the bacon

Prep: 

Lettuce, wash leaves 

Tomatoes, wash & slice

Collect:

Mayonnaise

Pepper mill

Here's how to properly assemble:

  • Cut off desired length of loaf for sandwich, slice in half lengthwise

    • Optional: toast the bread

  • Slather both sides with mayonnaise

  • Heap chopped bacon on one half

  • Grind black pepper over bacon

  • Top with a single layer of sliced tomatoes

  • Grind black pepper over tomatoes

  • Hit with a light sprinkle of salt (optional)

  • Mound on lettuce leaves

  • Top with mayo'd bread

Serve immediately.


Brenda’s tips:

  • Brenda uses double the mayonnaise on BLTs as compared to other sandwiches

  • Maximize the lettuce - provides great crunch

  • Chopping the bacon will allow even distribution and prevent bacon-less bites.


Window to B’s kitchen…

Read More
B's Favorite, Cake, Desserts, Fan Favorite Brenda Drake + Chelsea Kasen B's Favorite, Cake, Desserts, Fan Favorite Brenda Drake + Chelsea Kasen

Chocolate Pudding Frosting

Brenda’s favorite cake frosting: this Chocolate Pudding Frosting. It’s a fan favorite too.

Chocolate Pudding Frosting

Step 1

Remove from refrigerator, and add to bowl of stand mixer:

1 cup (2 cubes) butter

Set aside to come to room temp.


Step 2

In a small saucepan, combine:

2/3 cup sugar

1/3 cup flour

3 T cocoa 

1/8 tsp salt

1 cup milk

Cook over medium heat, stirring continuously, until thickened. Remove from heat. Set aside to cool.


Step 3

In a microwave safe bowl, heat until just softened:

1 cup chocolate chips (semi sweet recommended)

Stir until smooth and set aside to cool.


Step 4

Wait until everything has reached room temperature.


Step 5

Whip the butter for 15 seconds, add:

Chocolate pudding mixture, cooled (from Step 2)

Whip on medium, scraping sides of bowl regularly, for 1-2 minutes. 

Pour in:

Chocolate chips, melted & cooled (from Step 3)

Whip until light and fluffy, 2-3 minutes. Frost a cake or cupcakes.


Brenda’s tips:

  • Serving size: Frosts one 8"- 3 layer cake or ~36 cupcakes

  • This frosting doesn’t rejuvenate well, so Brenda makes it immediately prior to using. If necessary, refrigerate, then bring to room temperature before frosting your cake.

  • Remember to freeze cakes prior to decorating for smooth application of frosting.

  • Frosting made with cooked flour & milk is known as Heritage Frosting or Ermine Frosting or a variety of other names. It's generally not as sweet as buttercream frosting and is also more heat stable. It stays soft to the touch and the sugar doesn't crystalize as readily as other sugars. Basically it's perfect. Go bake a cake so you have a reason to make this frosting!

Read More
B's Favorite, Breakfast, Desserts, Fan Favorite Brenda Drake + Chelsea Kasen B's Favorite, Breakfast, Desserts, Fan Favorite Brenda Drake + Chelsea Kasen

Brigham Young Donuts (Cake Donuts)

These delicious cake donuts are a favorite tradition for Brenda and her family. During The Church of Jesus Christ of Latter-day Saint’s semi-annual General Conference Sessions, Brenda makes these to feast on during the broadcasts.

These delicious cake donuts are a favorite tradition for Brenda and her family. During The Church of Jesus Christ of Latter-day Saint’s semi-annual General Conference Sessions the first weekend of April and October, Brenda’s mom would makes these as a special General Conference breakfast. Brenda has carried the tradition with her to the different places she has lived, and hopes you make them part of your family traditions too!


Brigham Young Donuts (Cake Donuts)

To your favorite mixing bowl, add in order:

1 cup milk, warmed to about 80F

1/4 cup potato flakes

1/2 cup sugar

1 egg

5 tsp oil

3/4 tsp cinnamon

1/4 tsp nutmeg

Whisk together, then stir in:

1/2 tsp salt

1 1/2 tsp baking powder

2 1/4 cup flour

Knead 30 times (similar to biscuit dough).

While kneading, add: 

1 Tbsp flour increments, up to 1/2 cup

Let rest 10 minutes.

While resting…

Heat oil:

  • Use an electric fryer, set to 360-375F

  • Or, fill a medium pot with 2-3" of oil, turn heat to medium

Prepare a cookie sheet covered with a clean dish towel.

Prepare a cake pan covered with paper towels or clean paper sacks.

Roll dough out on a lightly floured silicone mat or countertop, roll to about 3/4" thick. Using a donut cutter, cut donut rounds and set on the towel covered cookie sheet.

Fry in small batches:

  • Carefully drop donut into hot oil

  • Let cook until the area just above the oils surface begins to brown, then flip

  • Cook for 2-3 minutes on the other side.

  • Carefully remove from the hot oil, placing on the paper lined pan

 Cool enough to frost and then enjoy.


 Brenda’s Tips:

  • Serving size: 12 donuts, standard size. Recipe can be multiplied.

  • Brenda recommends slicing the donut like a bun and putting the frosting in the middle to make a delicious donut sandwich! Her favorite combinations:

  • No donut cutter? Use a biscuit cutter for the outer circle and a small medicine bottle to punch out the center.

Read More
B's Favorite, How To Brenda Drake + Chelsea Kasen B's Favorite, How To Brenda Drake + Chelsea Kasen

HOW TO: Cut Paper Snowflakes

‘Tis the season for paper snowflakes! In this how-to, Brenda walks you through folding, cutting, and ironing realistic looking snowflakes.

Brenda LOVES Christmas. Every year she’d decorate the apartment with her paper snowflakes. She would meticulously hang these perfectly cut creations with white sewing thread all over the apartment. It felt like walking into a winter wonderland every time I’d come home.

Her snowflakes are as popular as her food. Throughout the year Brenda would have friends come to the apartment to learn how to make Brenda Cookies and Brenda Brownies. November and December friends would come over for snowflake cutting parties. And guess what? Everyone was able to create stunning snowflakes. It really is a simple and forgiving process!

The first section is a short instructional guide. If you need more instructions, scroll to the Brenda’s Tips section. Included at the very bottom, in the Window to B’s Kitchen… section, is a YouTube video, for all of us visual learners (:

Happy Snowflaking!


HOW TO: Cut Paper Snowflakes

What you’ll need:

Paper: Regular printer paper (20 pound and bright white)

Scissors: Fiskars (old sewing scissors) or others with a strong, sharp blade

Step 1: Folding

  • Sailboat fold (360 / 2 = 180 degrees)

  • House fold (180 / 2 = 90 degrees)

  • Accordion fold in thirds (90 / 3 = 30 degrees)

  • Flip and fold the other side in thirds (90 / 3 = 30 degrees)

  • Find the shortest edge

  • Trim to the shortest edge

Step 2: Cutting

The goal is to create negative white space. It is necessary to keep enough paper to maintain structural integrity, but remove enough to achieve the ethereal illusion of snow.

Here’s how:

  • Use the part of the blade that is near the hinge for control.

  • Variations in size and shape of cuts allow for more attractive snowflakes.

  • Start with large cuts. The large cuts will act as the template for deleting paper (aka that negative white space mentioned).

  • Add small, clean cuts which will develop like facets of the crystals found in real snowflakes.

  • And finish up with “snips” - small bites of paper removed to add dimension and create a unique paper snowflake. Great for adding character to the crisp cuts already made.

Step 3: Pressing

Open carefully and back-fold each crease. Press with a hot, dry iron between two sheets of paper. Tie white thread to one tip and hang from the ceiling or from windowsills.


Brenda’s Tips:

What you’ll need:

Paper: Regular printer paper (20 pound and bright white)

Other paper is fine, but the heavier types are difficult to fold and even harder (on your hands) to cut through. Tissue paper is very easy to fold but doesn’t have the strength to hang without flopping.

Scissors: Fiskars (old sewing scissors) or others with a strong, sharp blade

Use scissors that comfortably fit your hand. Make sure those Fiskars are retired from fabric use.

Step 1: Folding

Real snowflakes generally have six points. They are not perfectly symmetrical, but usually very close. To create this shape from a piece of paper, the following formula may help: A circle has 360 degrees, to create six points, there need to be twelve sections. 360 degrees / 12 sections = 30 degrees per section. Therefore the “wedge” created when folding the paper will fit exactly 30 degrees. If you have access to a cutting mat, it generally has the 30/45/60 degree angles marked.

Sailboat fold (360 / 2 = 180 degrees): Bring the right top corner diagonally down, aligning the top edge perfectly with the left edge of paper. Use your fingertip (not nail) to firmly press the crease created. You’ve created a sailboat.

House fold (180 / 2 = 90 degrees): Bring the left top corner diagonally down toward the right edge, aligning the left (+ former top) edge with the former right edge of the paper. Use your fingertip to firmly press the crease created. You’ve created the house.

Fold in thirds (90 / 3 = 30 degrees): Lift the “roof” of the “house,” one edge will be hinged. Working with the lifted section, fold the “roof” in equal thirds

  • The final snowflake will have 12 equal sections, each a 30 degree angle.

  • Accordion fold - the purpose of folding in this manner is to keep the size of the angle on each of your 12 triangles as equal as possible.

  • Keep the tip sharp - this also helps keep the angles equal, which results in a symmetrical final snowflake.

Flip and fold the other side in thirds, following the same lines and logic. Once again, it is important to align the tip and the sides of the paper as you fold, precision determines success.

Folding is complete. Hold the tip in your hand. Looking at the opposite end, find the shortest edge. This paper edge determines the size of your snowflake.

Trim to the shortest edge. Always make this your first cut or you may forget about the short edge and regret it later.

The excess paper just trimmed can be used for tiny flakes.

You’re ready to cut!

Step 2: Cutting

The goal is to create negative white space. It is necessary to keep enough paper to maintain structural integrity, but remove enough to achieve the ethereal illusion of snow.

Note: it will be tempting to remove the tip, but let it be. The tip left intact will maintain the structural integrity of the snowflake and enhance it’s ability to hang. Not only that, but real snowflakes generally have ice at their centers.

Use the part of the blade that is near the hinge for control. This allows for clean cuts, and will make effective cuts complete through all layers.

Remember: variations in size and shape of cuts allow for more attractive snowflakes.

Start with large cuts. Just as the step of trimming to the shortest edge limits your snowflake, the large cuts will act as the template deleting paper (aka that negative white space mentioned). Generally plan the following large cuts:

  • One near the tip

  • One on the opposite edge

  • One shaping the top edge, most commonly shortening one of the edges. This will create the outer border of your final snowflake.

Add small, detailed cuts that will develop like facets of the crystals found in real snowflakes. Strategy for these cuts:

  • One or two near the tip

  • A series of cuts along both edges

  • One or two that are used to enhance the top edge

And finish up with “snips” - small bites of paper removed to add dimension and create a unique paper snowflake. Some possibilities:

  • Clip bits out to shape the larger cuts

  • Create a “pinked” edge

  • “V” or “X” clips

  • Tiny diamonds or slits

Remember throughout: repeating patterns create symmetry

Long story short: Fold . . . . Fold . . . . Cut edge . . . . Large cuts . . . . Detail cuts . . . . Snips . . . . Unfold

Step 3: Pressing

And the often over-looked step – press with a hot iron! Don’t be afraid to throw it away if you don’t like it! But first, back-fold each crease and press the finished snowflake with a hot, dry iron. The heat from the iron will remove the folds and crisp the paper, almost like adding starch to fabric.

Tie white thread to one tip and hang from the ceiling or from windowsills. The snowflakes can then be hung from the ceiling using white thread or taped to windows for display.

Practice and practice!

Each year Brenda will cut a series of new paper snowflakes. For years she taught her nieces and nephews to cut paper snowflakes. When Brenda’s little sister was getting married she requested paper snowflakes as the decoration for her DIY open house. Brenda cut somewhere between 200 and 300 snowflakes for that. No two were the same! These days, she continues to hang paper snowflakes from the ceiling and now uses the tiny ones for decorating the family Christmas tree.


Window to B’s Kitchen…

Step 1: Folding

Step 2: Cutting

Step 3: Ironing

YouTube Tutorial

In 2013, in NYC, our good friend (and neighbor at the time) Allison created this YouTube tutorial for making Brenda Snowflakes.

Read More
B's Favorite, Desserts, Fan Favorite, Pie Brenda Drake + Chelsea Kasen B's Favorite, Desserts, Fan Favorite, Pie Brenda Drake + Chelsea Kasen

Chocolate Mousse Pie

This Chocolate Mousse Pie recipe is a super-secret recipe. That’s why you just found it on the internet.

Every Thanksgiving in NYC Brenda would make this pie. You felt lucky if you were able to snag a sliver before it was fully consumed. Sometimes the pie pan would be licked clean (shhhhh, don’t tell Brenda).

Origin: Brenda developed this pie during her high school years. It even won a local pie contest. Keep in mind she grew up in Vale, OR; a very small farm town without a traffic light. This means there was some fierce competition by stay-at-home-mamas, and teenagers who were trying to get out of farm chores.

The only variation to this recipe has been the pie crust. Initially, she used a chocolate graham cracker crust, until succeeding in developing a baked chocolate crust with all the layers of tender flakiness you dream about.

Brenda’s dabbled in making tiny variations to the filling, but the original creation was so good she decided no improvement is needed.

Any chocolate fan* agrees this is the best chocolate mousse pie you’ll ever consume.

*This recipe makes one 9" pie. You might want to go ahead and double it before you even start. One for you and one to share.


Chocolate Mousse Pie

Step 1: Fudge sauce

In a two quart saucepan, combine:

3 Tbsp cocoa

1 tsp shortening

3/4 cup sugar

2 tsp corn syrup

1/8 tsp salt

1/4 cup milk

Cook over medium heat, whisking constantly, until the mixture reaches a mild rolling boil. Reduce heat to low, simmer, without stirring, to soft ball stage (235F)*. Remove from heat.

Drop on top but don't mix yet:

1/4 cup cold butter

Cool to lukewarm (maximum temp 110F)**, then blend at medium speed with an electric mixer until sauce is creamy. Set aside to cool to room temperature.

Step 2: Chocolate pie crust

In a medium mixing bowl, sift together:

1 cup flour

2 tsp cocoa 

2 Tbsp powdered sugar

1/4 tsp salt

Cut in each individually:

1/4 cup oil

2 Tbsp cold butter, sliced thin

Make a well, add:

1 tsp increments cold water, up to 3 tsp

Fold the water in, mixing as little as possible, until a shaggy dough forms. Lightly press into a ball. Place between two sheets of plastic wrap and roll into a circle to fit a 9" pie plate. Bake at 350F for 10 minutes. Set aside to cool.


Step 3: Whipped cream

In a medium mixing bowl, combine:

1 1/4 cup heavy cream

2 Tbsp sugar

Whip until stiff. Set aside.


Step 4: Assemble filling

In a separate medium mixing bowl, combine:

8 oz cream cheese, softened

3/8 cup sugar

1/2 tsp vanilla

Using an electric mixer, beat until smooth. Whip the fudge sauce (Step 1) into the cream cheese, mixing until well blended. Fold in the prepared whipped cream (Step 3). 


Step 5: Finalize

Spoon filling (Step 4) into cooled chocolate pie shell (Step 2). 

Top with:

1 oz chocolate shavings  

Chill. Serve.


Brenda tips:

  • Serving Size: one 9 inch pie

  • Brenda recommends storing in the refrigerator. This pie will keep for days and days, and the crust never becomes soggy. 

  •  12 oz Frozen Whipped Topping (thawed) can be substituted in place of making whipped cream (Step 3).

No thermometer? 

  • *Soft ball test: grab a small bowl and add about 1/2 cup cold water. After the sauce has cooked at a rolling boil for a few minutes and appears to have thickened somewhat, drop a spoonful into the cold water. If you can push it into a ball, the sauce has reached soft ball stage. If it dissolves, the sauce needs to cook longer. Test again after a few more minutes of boiling. The sauce reaching this stage is dependent on variables such as the humidity in your kitchen. Sometimes it can be reached in 5 minutes and at other times it takes nearly 20. 

  • **Lukewarm: this is less critical but can be determined by carefully feeling the outside of the pot of fudge sauce. If it is cool enough to touch without pulling away, the sauce should be cool enough to blend.

  •  This is a super secret recipe, that’s why you just found it on the internet.


Window to B’s kitchen…

Step 1: Whipping the fudge sauce

Step 4: Making the cream cheese mixture

Step 4: Mixing the cream cheese mixture and the fudge sauce

choclate mousse pie 3_small.jpg

Step 4: Folding the whipped cream into the cream cheese and fudge sauce mixture

Discover & share this Animated GIF with everyone you know. GIPHY is how you search, share, discover, and create GIFs.

Step 5: Creating the chocolate shavings to top the pie with

Discover & share this Chocolate Mousse Pie GIF with everyone you know. GIPHY is how you search, share, discover, and create GIFs.

The final product . . . yum!

Read More
B's Favorite, Desserts, Pie, High Elevation Brenda Drake + Chelsea Kasen B's Favorite, Desserts, Pie, High Elevation Brenda Drake + Chelsea Kasen

Pie Crusts

Brenda is known for her pies. Why? Brenda’s NYC pie parties were of epic proportions. These are her 5 favorite pie crusts.

Brenda is known for her pies. Every Thanksgiving she lived in NYC she would host a pie party. She’d cook at least 8 different pies, and if my memory serves me right, each year she’d add more and more pies. She’d even send out a survey before each pie party asking for requests. Don’t believe me? When we first started this blog a friend commented,

“If you need testimonials, Brenda’s pies Thanksgiving 2014 changed my life.”

She claims growing up in a large family (she’s one of 13 kids), she grew accustomed to making lots of pies. She wanted to keep the tradition alive and the pie parties commenced.

All this pie making has lead to several pie discoveries for Brenda. The most important: generally, people will only notice crust that is too thick or undercooked. So the most important factor in determining which pie crust to make is elevation.

Keep in mind, Brenda will share all of her pie fillings soon, but for now, she’s sharing 5 … YES FIVE … pie crust recipes to get you started.


Brenda’s tips:

I know my tips usually follow the recipe, however, there are a couple of very important things you must know before you start. 

  • Serving Size: each of these recipes make 1 bottom and 1 top crust for a 10” pie (or about 2 bottom crusts for a 9” or about 3 for an 8”)

  • Each of these recipes were written to be made by hand.

  • Do not over mix! Pies should have flaky, crisp, yet tender crusts. To create, the flour’s gluten should remain dormant which means don’t mix the dough any more than necessary once liquid is added. The fat does need to be cut into the flour, but all that mixing should happen before the water is added. 

  • Baking: many pie recipes recommend baking at 425F then reducing to 350F. Don’t do it. This results in pies that are beautiful on the outside and disappointing on the inside. Simply bake the entire time at 350F. Trust me.

    • Filled & baked generally need 60-70 minutes. No need to cover with tinfoil to prevent blackening the edges. Before baking, lightly brush the top with heavy cream (or milk) and dust with sugar for a beautiful, deliciously crinkly top.

    • Shell only: use a fork to pierce the sides & bottom of crust, then bake for 10 minutes. Cool, fill and serve.

 How to: Roll Out Pie Crust (being published Thursday!)


1. Fast & Easy Pie Crust

* Great almost anywhere, except high elevation

In a mixing bowl, cut together with a fork:

3 cups flour

1/2 tsp salt

3/4 cup oil

Make a well, add:

1 Tbsp increments cold water, up to 6 Tbsp 

Fold the water in, mixing as little as possible, until a shaggy dough forms. Lightly press into a ball.

No need to chill, simply divide, and roll out in circles to fit pie plate & top. 


2. Buttery Pie Crust

* Great almost anywhere, except high elevation

In a mixing bowl, cut together with a fork:

3 cups flour

1/2 tsp salt

1 cup cold butter, cut into 1/4” slices

Make a well, add:

1 Tbsp increments cold water, up to 6 Tbsp

Fold the water in, mixing as little as possible, until a shaggy dough forms. Lightly press into a ball.

Chill 30 minutes (up to three days), divide, and roll out in circles to fit pie plate & top.

3. Pie Crust for High Elevation 

In a mixing bowl, sift together:

3 cups flour

2 Tbsp powdered sugar

1/2 tsp salt

Then add:

2/3 cup oil

Cut together with a fork, set aside.

In a small mixing bowl, whisk together:

1 egg

1 Tbsp white vinegar 

3 Tbsp water

Fold the liquid into the flour mixture, until shaggy dough forms. Turn out on floured surface. Fold in half, press together firmly. Repeat three times. Lightly press into a ball. Dough may be more sticky than traditional pie crust. 

Chill (or don’t), divide, and roll out in circles to fit pie plate & top.


4. Shortbread Pie Crust

* Great for any elevation, enough to make a bottom crust

Cream together:

1/2 cup butter

1/2 cup sugar

Stir in:

1/4 tsp vanilla 

Cut in:

1 cup flour

Mixture will be crumbly. Press lightly into a 10” round pie plate. Pre-bake 10 min at 350F, then fill and finish baking (50-60 minutes).


5. Graham Cracker Crust

*Great for any elevation, enough to make a bottom crust

In a mixing bowl, stir together:

1/4 cup butter, melted

1 pkg graham crackers, crushed

3 Tbsp sugar

Mixture will be crumbly. Press firmly into a 9” or 10” round. Bake 350F for 8-10 minutes.  Note: one package contains 9 crackers.

Read More
Bread, B's Favorite, Fan Favorite Brenda Drake + Chelsea Kasen Bread, B's Favorite, Fan Favorite Brenda Drake + Chelsea Kasen

Brenda's Favorite Yeast Dough

Brenda uses this dough recipe for donuts, scones, cinnamon rolls, dinner rolls…any type of roll.
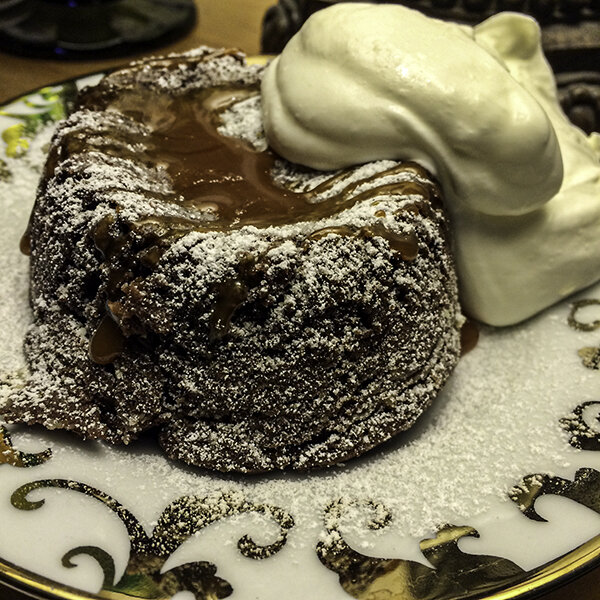
Brenda uses this dough recipe for:

If you’re new to kneading, check out Brenda's HOW TO: Knead Yeast Dough post.


Brenda’s Favorite Dough Recipe

To a large mixing bowl, add:

2 cups warm water 

4 tsp yeast

1/2 cup sugar

1/2 cup potato flakes

2 1/4 cups flour

Stir until combined, then mix each in individually:

4 Tbsp butter, softened

2 eggs

1 1/2 tsp salt

2 cups flour

Dough should be somewhat “shaggy” indicating that it’s thickened enough to knead. Clean spoon and begin to knead, sprinkling in:

1 Tbsp increments flour, totaling 1/4-1/2 cup

Knead for about 10 minutes or until dough “blisters” and is soft and elastic.

Let rise 45 minutes. 

Shape. 

Proof 45 minutes. 

Cook.

Let sit 5 minutes, then serve.


Brenda’s tips:

  • New to kneading? Check out Brenda's HOW TO: Knead Yeast Dough post.

  • Brenda always recommends allowing any and all yeast baked goods to rest five minutes after baking. If you cut into a loaf prior to the five minutes, the loaf will "steam," causing the interior to clump and an inferior crumb to result. Wait five minutes and the loaf will cut cleanly and have a smooth open crumb.

  • Need to save some? Enclose in an airtight container or bag and freeze. Even if you're serving only 24 hours after baking. To thaw, remove from freezer about 1-2 hours prior to serving. 

  • Proof means to allow the yeast to work (aka let the dough rise)

  • Yeast is a living organism. In order for yeast to cause the dough to rise, you must respect the ingredient and not kill the yeast early by:

    • burning it: too hot water

    • smothering it: butter/oil direct on yeast that hasn't yet bloomed will coat the yeast

    • poisoning it: salt added directly to yeast that hasn't bloomed


Window to B’s Kitchen…

Read More
Desserts, Fan Favorite, B's Favorite Brenda Drake + Chelsea Kasen Desserts, Fan Favorite, B's Favorite Brenda Drake + Chelsea Kasen

Brenda Brownies

I remember at the height of our Endurance Marathon Training Brenda would bake these brownies at least once per month. She’d eat the whole pan. NO LIE.

I remember at the height of our endurance marathon training (2015) Brenda would bake these brownies at least once per month. She’d eat the whole pan. NO LIE.

I’m still trying to perfect these brownies. The true test is to see if the brownies taste better over time, just like Brenda’s. She swears that day 4 is the best day to consume these brownies. I just can’t figure out how to keep these brownies around for that long…


Brenda Brownies

To your favorite mixing bowl add:

2 cups sugar

1/2 cup cocoa

Stir well, then cream in:

1 cup butter, softened

Next add:

1 tsp vanilla 

1 tsp salt 

4 eggs, mixing well after each

Finally, stirring until just incorporated, add:

2 cups flour 

Set oven to 350F. Spoon about half the batter into a greased 13x9 pan, sprinkle with:

3/4 cup miniature marshmallows

1/4 cup chocolate chips

Spoon and smooth the remaining batter evenly over the top.

Bake for 22-27 minutes. Serve cooled. 


Brenda’s Tips:

  • Stirring the cocoa into the sugar allows the granules to eliminate any lumps of cocoa, enhancing the texture of the finished brownies

  • If baking at sea level, reduce the flour to 1 1/2 cups

  • Recommended to use a metal pan. Using glass will cause the brownies to cook differently

  • These brownies are Brenda’s favorite dessert that she makes


Window to B’s Kitchen…

Read More
Cookies, Desserts, Fan Favorite, B's Favorite, High Elevation Brenda Drake + Chelsea Kasen Cookies, Desserts, Fan Favorite, B's Favorite, High Elevation Brenda Drake + Chelsea Kasen

Brenda Cookies

Meet the pinnacle of all Brenda Food: THE BRENDA COOKIE.

Meet the pinnacle of all Brenda Food:

THE BRENDA COOKIE.

Taking America’s Test Kitchen and New York Time’s Best Chocolate Chip Cookie recipes and making her own version, the Brenda Cookie was born. After 2 years of perfecting the recipe, she shared it with the world.

These cookies have brought so much JOY to thousands of people from coast to coast. Like, when I heard Marie Kondo talk about items that “spark joy” I thought of these cookies.

The smell. The taste. The layers of chocolate. The gooey centers. The crunchy edges. Mama mia!

Read the full Brenda Cookie Story, or make a half-batch!


The Brenda Cookie

Cream together, mixing for approximately 5 minutes:

1 cup (9 oz) brown sugar

1 cup (8 oz) sugar

1 1/4 cup (10 oz) butter, softened 

Then add, stirring until smooth:

2 eggs

2 tsp vanilla 

Sift dry ingredients together and fold into the above mixture:

3 1/2 cups (17 oz) flour

1 1/2 tsp baking powder

1 1/4 tsp baking soda

1/4 tsp salt

1 tsp coarse salt

Just before the dry ingredients are fully incorporated, add:

1 pkg (10 oz) Ghirardelli 60% Cacao Chips

Do not overmix!

Portion by scooping equal sized dough balls onto a greased 13x9. Cover and refrigerate 24-72 hours.

Bake at 370F for 8-10 minutes, adding 5 minutes for extra-large cookies. 


Brenda’s Tips:

  • Serving Size: Brenda’s 1/2 cup cookie scoop makes 18 or 19 balls of dough per batch

  • Brenda uses a stand mixer to make the cookies. She starts the butter and sugar creaming and then measures out all the other ingredients while waiting for the sugars and butter to whip. 

  • Resting the dough allows the flavors to fully meld and the textures to develop. This cookie has a chewy bite with just the right combination of intense dark chocolate and caramelized butter. It will taste good immediately, but if you can be patient it will be even better.

  • Brenda seldom recommends a brand, but you’ll notice that Ghirardeli 60% Cacao are listed. These chips will create the flat layers of intense chocolate that indicates a true Brenda Cookie.

  • At high elevations, add more flour. At the farm (2600 ft), Brenda uses 17.5 oz of flour and at home (6200 ft) Brenda uses 18.5 oz

  • Let the cookies rest 3-6 hours before serving or packaging. A properly prepared Brenda Cookie will stay soft internally without being stored in an airtight container.

  • Don’t want to make a full batch? Here’s the half-batch recipe.


Window to B’s Kitchen…

Creaming butter + sugar:

Incorporating flour:

Mixing in the chocolate chips:

Scooping the dough:

Read More